
How to automate a monorepo deployment with GitHub actions.

Introduction
If you want to deploy a web app or API manual, you need to follow these steps:
- connect to your server
- Move to the app directory
- Pull your new changes
- Install the new packages
- Remove the old build folder and run the build command.
As you see, there is a lot of work you need to do every time you push changes to your app. You don't want that. What you want is to automate the deployment of your app, So you don't have to do all the steps above every time. And to save your time.
In this article. You will learn how to deploy your app to a Virtual private server(VPS) and Vercel
Prerequisites
If you wish to follow along, here is the code I will be using in this guide. Monorepo repository
Before you continue reading this article, you should have:
- Nginx installed. If you don't know how, read this article Install nginx
- Virtual private server (VPS) to host our back-end
- Vercel account to host our front-end
- GitHub account
- Yarn
Configure GitHub Actions
Configure backend
You are going to deploy and configure the backend first.
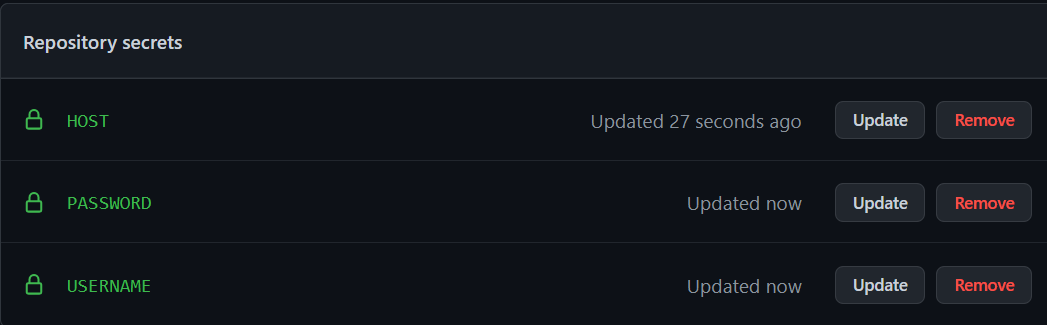
First, you need to configure your repository by following these steps:
- Go to your repository settings
- Click secrets and go to actions
- Add new secrets:
HOST: Your server IP address (e.g.45.32.159.93)USERNAME: Your server username (e.g.root)PASSWORD: Your username password
To configure GitHub actions, you need to create a folder .github/workflows.
Inside workflows folder create a backend.yml file.
Add the following inside backend.yml
name: deploy backend

on:
  push:
    branches: [main]
    paths:
      - 'packages/server/**'
  pull_request:
    branches: [main]
    paths:
      - 'packages/server/**'

jobs:
  build:
    runs-on: ubuntu-latest
    strategy:
      matrix:
        node-version: [16]
    steps:
      - uses: actions/checkout@v2
      - uses: actions/setup-node@v2
        with:
          node-version: ${{ matrix.node-version }}
          cache: 'yarn'
      - name: Install
        run: yarn install
      - name: Test
        run: yarn test
      - name: Build
        run: yarn build

  deploy:
    needs: build
    name: Deploy backend
    runs-on: ubuntu-latest

    steps:
      - uses: actions/checkout@v2
      - name: copy files
        uses: appleboy/scp-action@master
        with:
          host: ${{ secrets.HOST }}
          username: ${{ secrets.USERNAME }}
          password: ${{ secrets.PASSWORD }}
          source: '.'
          target: '/home/ubuntu/github-action'
      - uses: appleboy/ssh-action@master
        with:
          host: ${{ secrets.HOST }}
          username: ${{ secrets.USERNAME }}
          password: ${{ secrets.PASSWORD }}
          script: |
            cd /home/ubuntu/github-action
            rm -rf packages/web
            yarn install
            cd packages/server
            yarn build
Let me explain the script above.
name: The name that will appear in the Actions tab of the GitHub repository.on: Specifies when the workflow will trigger. in our case we want 'backend.yml' to run when there is a push or pull request to main branch. and only when something change in packages/serverjobs: group together all jobs you want to runrunes-on: The type of runner that the job will run onsteps: Group together all the task, that will run on build job.needs:only trigger this workflow whenbuildis done.
Before you push, the changes you made to GitHub, You need to ssh into your server and add your API config.
- Create a config file for your API:
sudo nano /etc/nginx/sites-available/api
Add the following config below:
server {
        listen 80;
        server_name _;

        location / {
        proxy_pass http://localhost:5000;
        proxy_http_version 1.1;
        proxy_set_header Upgrade $http_upgrade;
        proxy_set_header Connection 'upgrade';
        proxy_set_header Host $host;
        proxy_set_header X-Forwarded-Proto $scheme;
        proxy_cache_bypass $http_upgrade;
    }
}
CTRL + X to save the file.
- Enable the server by symlinking to the /etc/nginx/sites-enabled directory
sudo ln -s /etc/nginx/sites-available/api /etc/nginx/sites-enabled/
change api with your config name
- Verify your configuration
sudo nginx -t

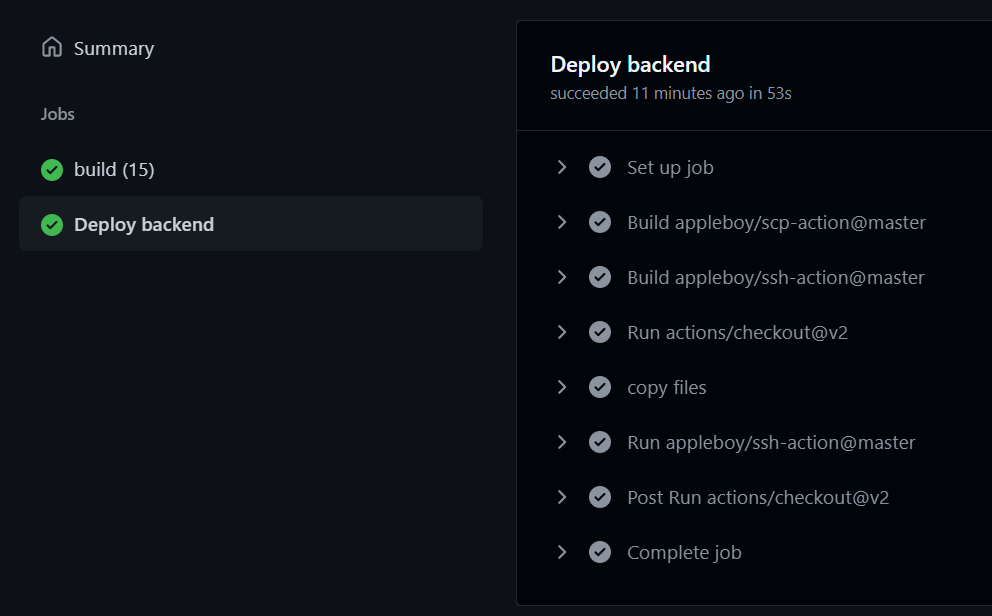
Now, change your backend code and push the changes to your repo on GitHub.
Navigate to the action tab on your repo, you will see the following:
Everything is good so far, but how do we start the API using GitHub action? For that, we need to install pm2.
ssh to your server and install pm2, by running the following command
yarn global add pm2
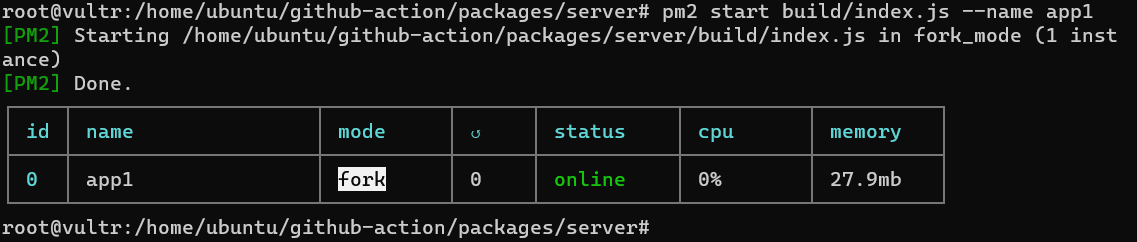
Once pm2 installed cd to your project directory:
cd /home/ubuntu/github-action/packages/server
pm2 start build/index.js --name app1
you should see the following output.
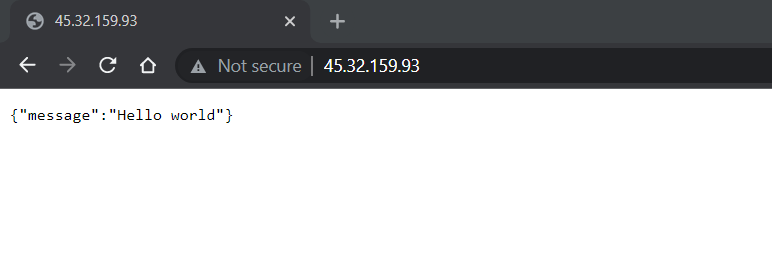
Congratulations, Now navigate to your browser and type your server's IP address.
Go to backend.yml file and the following script after yarn build:
pm2 restart app1
What this will do is to tell pm2 to restart our API every time there is a change in our code.
Configure frontend
Now you are done with the backend, it's time to deploy front-end code.
First, create a new file frontend.yml inside .github/workflows and add the following:
name: deploy frontend

on:
  push:
    branches: [main]
    paths:
      - 'packages/web/**'
  pull_request:
    branches: [main]
    paths:
      - 'packages/web/**'

jobs:
  build:
    runs-on: ubuntu-latest
    strategy:
      matrix:
        node-version: [16]
    steps:
      - uses: actions/checkout@v2
      - uses: actions/setup-node@v2
        with:
          node-version: ${{ matrix.node-version }}
          cache: 'yarn'
      - name: Install
        run: yarn install
      - name: Build
        run: yarn build:web

  deploy:
    needs: build
    name: Deploy frontend
    runs-on: ubuntu-latest
    steps:
      - uses: actions/checkout@v2
      - uses: amondnet/vercel-action@v20
        with:
          vercel-token: ${{ secrets.VERCEL_TOKEN }}
          github-token: ${{ secrets.GITHUB_TOKEN }}
          vercel-args: '--prod --force'
          vercel-org-id: ${{ secrets.ORG_ID}}
          vercel-project-id: ${{ secrets.PROJECT_ID}}
Now, You need to add your vercel environment variables to your GitHub repo. Same as you did in the backend part.
run the following command:
npx vercel
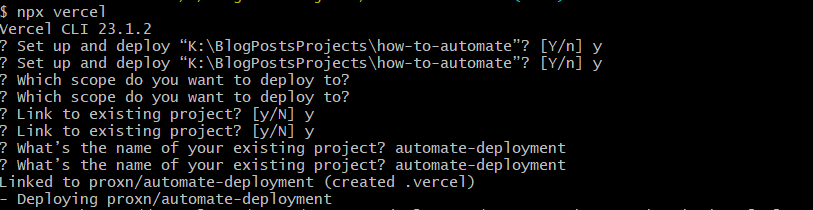
A new .vercel directory will be added to your directory.
You will find projectId and orgId inside .vercel/project.json, all you need to do is add them to your GitHub repo.
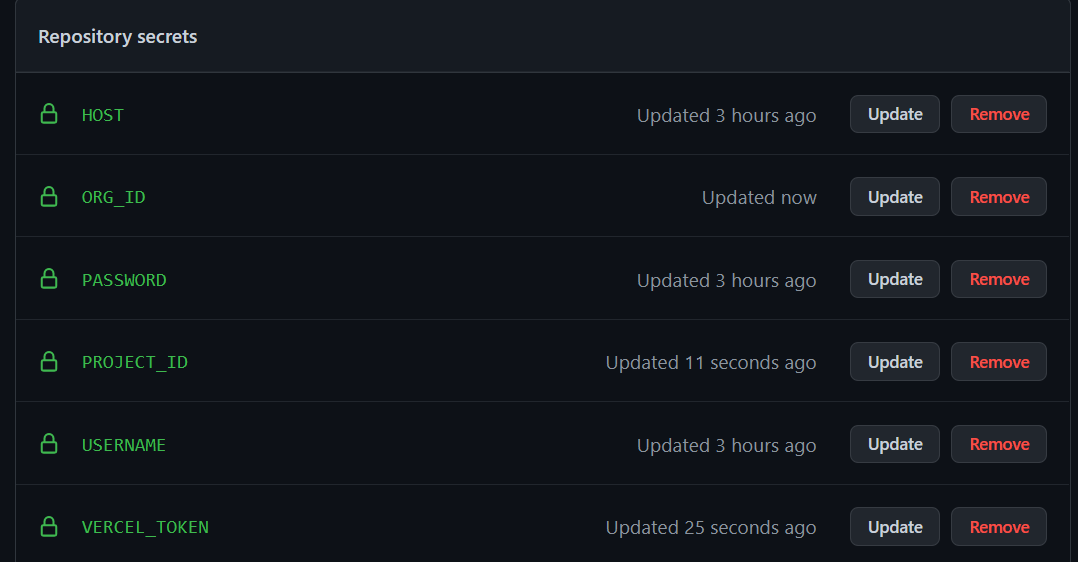
You can create vercel token from Create vercel token
Add a new file, vercel.json to your root directory and add the following:
{
  "github": {
    "enabled": false
  },
  "builds": [
    {
      "src": "packages/web/package.json",
      "use": "@vercel/next"
    }
  ],
  "routes": [
    {
      "src": "/(.*)",
      "dest": "packages/web/$1",
      "continue": true
    }
  ]
}
Now change something in packages/web and push the change to GitHub repository.
Head to your GitHub repository and click and on Action you see this:

Once the action done, go to vercel.com, and you will see that your website deployed.
Conclusion
Now that you’ve read this post. You should know how use GitHub actions to automate your deployment and save your time.
Drop a follow on Twitter if you like me content.